Ultimate security and enhanced privacy are two reasons why many people prefer Apple products over other manufacturers. Sure, devices like the iPhone and iPad give you enough protection to go around. Even when you lose one of these devices, Apple can help you retrieve it — or, at least, prevent data misuse.
Apple manages to do this using a feature called Find My iPhone, also known as Find My. This service will help you to find a lost/stolen Apple device and prevent strangers from accessing the data inside. However, many people forget to enable this feature or fail to add all their devices to it. And that’s not good enough.
This article covers how you can add a device to Find My iPhone, including an iPhone, MacBook, or a pair of AirPods. Before that, we will talk a little about Find My iPhone itself.
What Is Find My iPhone?
Find My iPhone is the name of an application that Apple initially released on 15th June 2010. The app allowed remote location tracking of devices running Apple’s OSs, including the iPhone, iPad, Macs, Apple Watch, and even AirPods. However, starting from iOS 13, the application has been renamed Find My, and it has become an integral part of the iOS/iPadOS/macOS system.
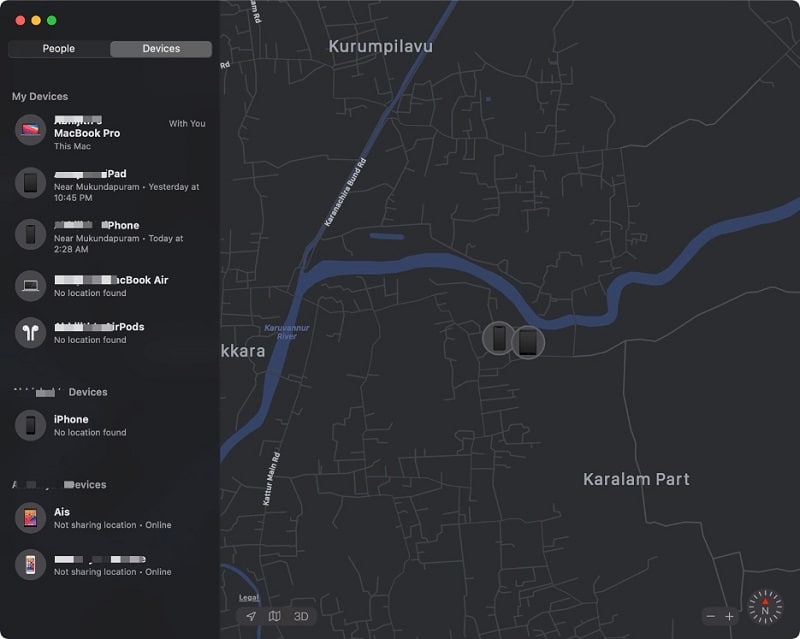
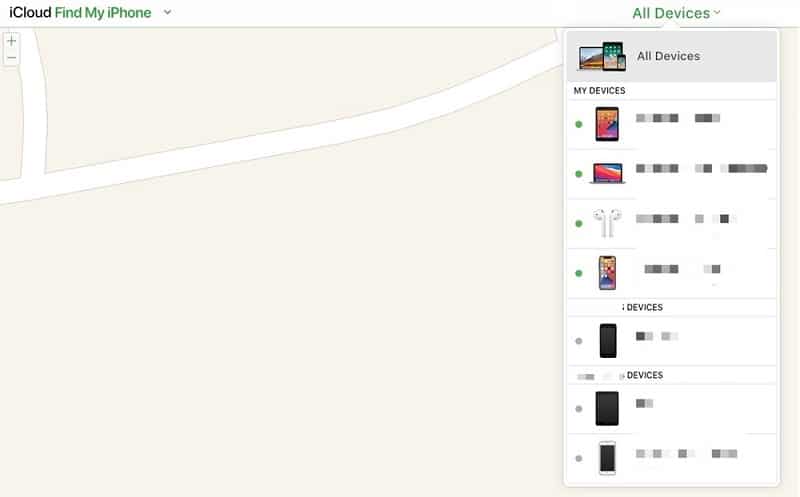
Here’s how the Find My app functions: Anytime, users can open the Find My app on their iPhone/iPad/Mac to find their devices’ real-time location. For instance, as you can see on the image above, I can track the real-time location or the last-known location of the devices connected to Apple ID.
Alternatively, you can access the same information via the web. The Find My iPhone on the Apple website can show you the current location of available devices with essential details.
For instance, when you track an iPhone using Find My iPhone, you can track its real-time location, battery status, and when the device was last found online.

There are also a few more features on the Find My iPhone app, making all the difference.
Play A Sound
Pressing this button will play a loud sound on the selected device. This will happen even if the device on Silent Mode. It’s a great feature to find your iPhone if you misplaced it somewhere nearby. This option works on iPhone, Mac, iPad, Apple Watch, and even AirPods.

Lost Mode
You want to activate this mode if you think your device has been lost/stolen. When you do this, you can set up a custom message on the screen, probably with the contact details. This mode also turns off Apple Pay, display alerts, notices, or notifications. You can still make phone calls and FaceTime calls. Your iPhone will automatically turn on Location Services to make tracking possible.
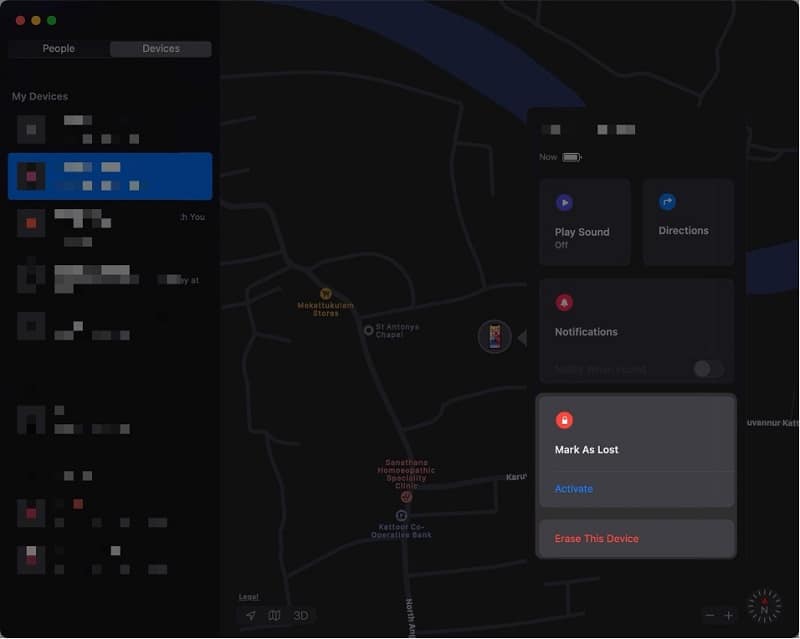
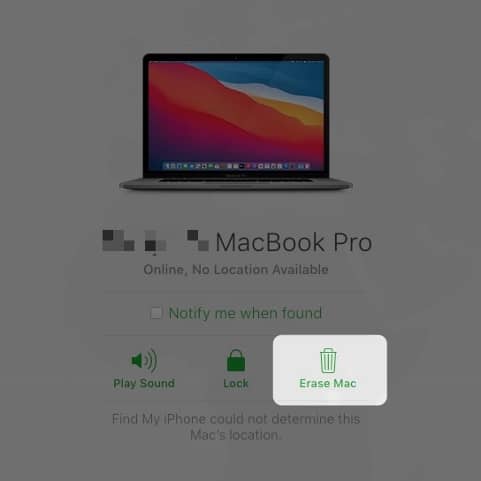
Erase Device
This is the extreme step to take when you think you have lost your iPhone, iPad, or Mac. Executing this command will remove all information from the device, but Apple would keep the Activation Lock turned on. Activation Lock prevents strangers from accessing the device. They’ll have to enter your Apple ID credentials to reactivate the device.
Please keep in mind that erasing the device will stop you from tracking the location or playing the alert. That having said, if the Apple device connects to a Wi-Fi network that it was previously connected to, you can see the updated location on the Find My app.
Note: If you manage to get your device back after turning on the Lost Mode, you can log in using the passcode and disable the Lost Mode after that.

By the way, you can access all this information from any device where you have installed the Find My app.
How to Add iPhone on Find My iPhone?
Now, let’s look at how you can add a new/existing iPhone to Find My.
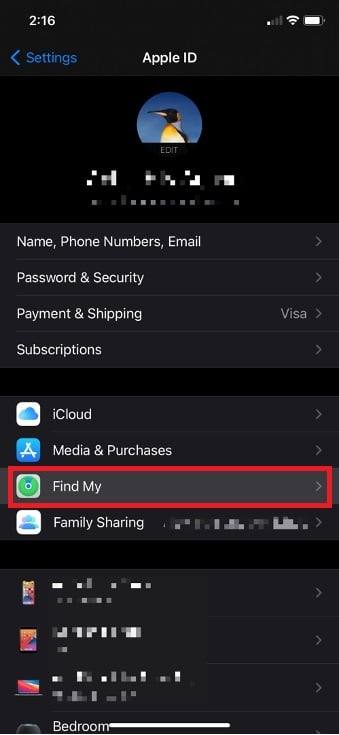
Step 1. Go to Settings and tap on your name on the top portion.
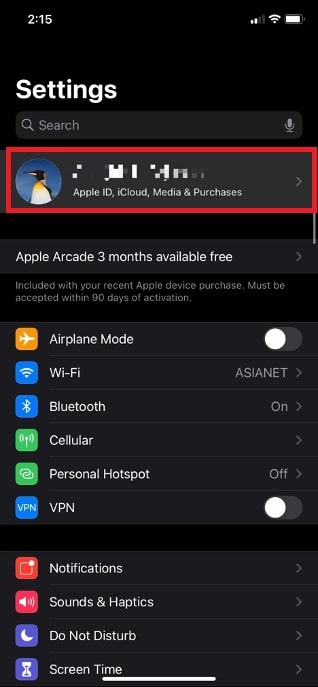
Step 2. Choose Find My from the available options.
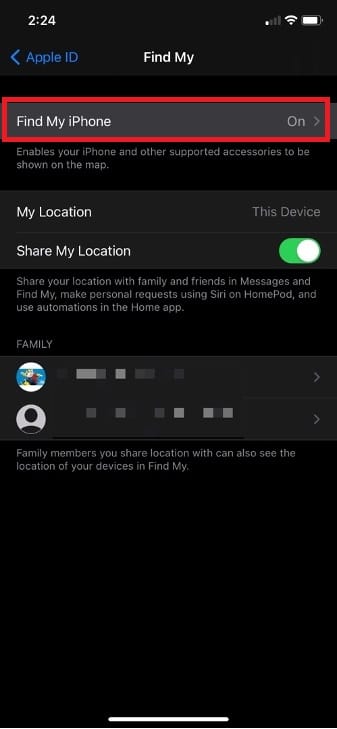
Step 3. On the next screen, tap on the option named ‘Find My iPhone.’
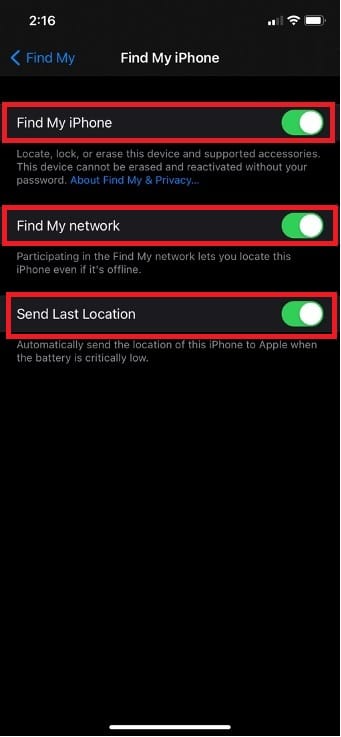
Step 4. Now, turn on Find My iPhone, along with Find My network and Send Last Location.
If you are setting this up for the first time, you may be asked to enter your Apple ID. In case you don’t have an Apple ID, you can create one in a few taps.
Now, you have successfully added the iPhone to the Find My iPhone network. You can follow the same steps on your iPad to add it to the Find My system.
How to Add MacBook to Find My iPhone?
Here is how you can protect the data and privacy of your MacBook, MacBook Air, or MacBook Pro using the Find My iPhone feature.
The steps are as follows.
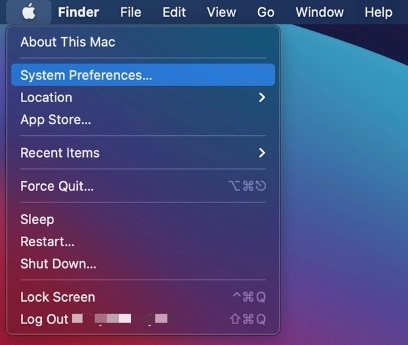
Step 1. Go to Finder and choose Apple Menu > System Preferences.
Step 2. On the next page, click on the Apple ID button, which you can find on the top-right portion.

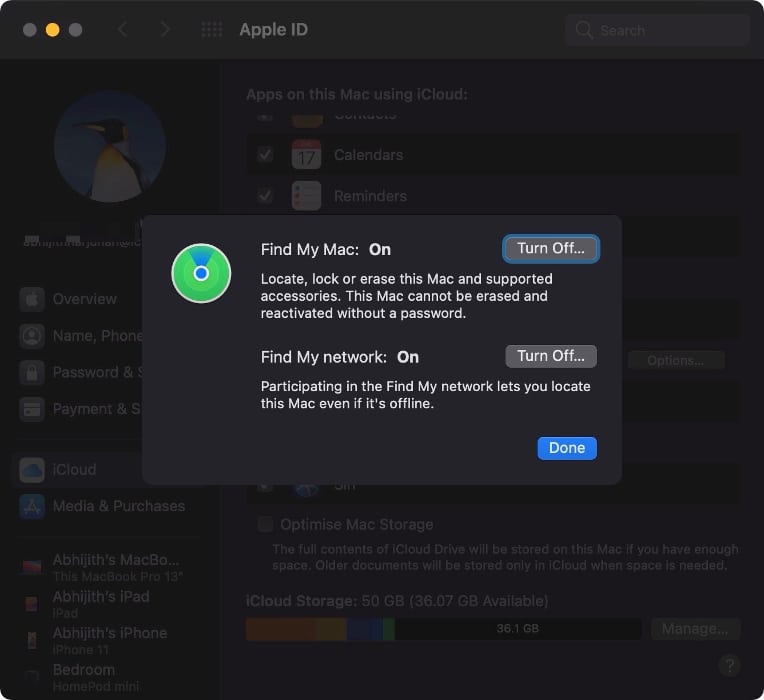
Step 3. On the upcoming menu, ensure that you have enabled Find My Mac. If not, you can check that box, and you’ll be good to go.
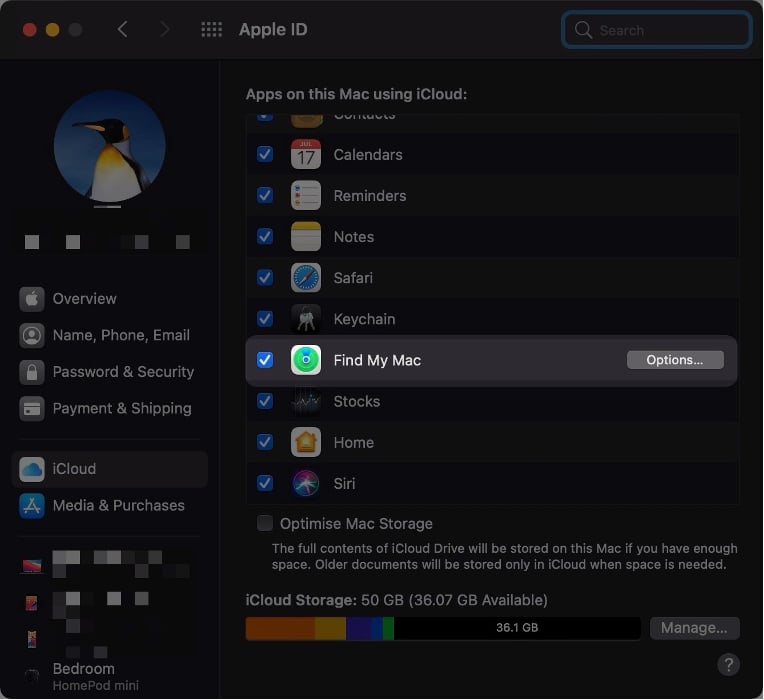
Step 4. You can click on the Options button to check advanced options within Find My Mac.
Wasn’t that simple?
How to Add AirPods to Find My iPhone?
Adding AirPods to Find My iPhone is probably the easiest option in this guide. As you know, AirPods do not have any location services on them. Instead, they use the network connection of the iPhone/iPad/Mac that they are paired with.
To add an AirPods to Find My Phone, pair the AirPods/AirPods Pro with a device linked to the Apple ID. This should do the job, and you can enjoy all the Find My features that we had shown above at ease. And if you ever want to remove it from Find My iPhone, you can disable the pairing.
That’s easy, we believe.
How to Remove A Device from Find My iPhone?
There are times when you want to remove a specific device from your Find My iPhone network. You may be planning to give the device to someone or selling the device. We think the best way to do this is via iCloud. So, you can follow the steps that we have given below.
Step 1. Go to Find My iPhone on iCloud and sign in using your Apple ID.
Step 2. Make sure that you have turned off the device that you want to remove. In the case of AirPods, you can keep them inside the Charging Case.
Step 3. From the list of devices, choose the one that you’d like to remove.
Step 4. At the bottom, press on the button named ‘Remove from Account.’
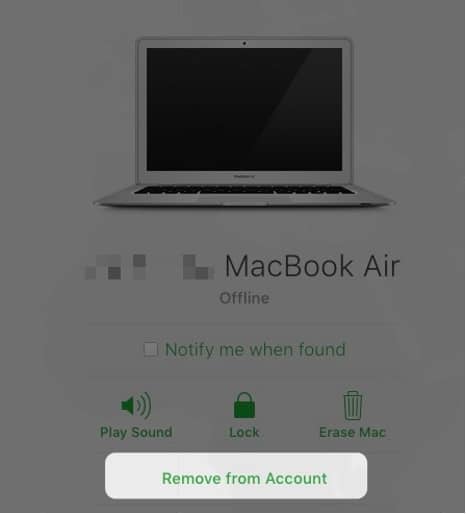
That’s it. You have removed the device from Find My iPhone. You can repeat the process for any number of devices. By the way, you can do the same thing using Find My apps on iPhone, iPad, and Mac.
Note: If you plan to sell your iPhone, iPad, or Mac to a stranger, you should turn off Find My before making the final deal. If you forget to do that, the other person would be stuck on the Activation Lock screen. You’ll then have to remotely erase and remove the device from your account so that the other person can access the device.
The Bottom Line
We hope you got a clear idea about Find My iPhone and add devices to the system. Used in the right manner, Find My iPhone can help you get back a lost/stolen device. Even if you don’t get the device back, it gives an assurance that nothing would happen to your data privacy. So, make sure you take the best advantage of it with all the Apple devices you have.

