
Accidentally deleting your important data and not having a backup of it is one of the worst things that could happen to your smartphone experience. Lots of people suffer from this issue every day. As you’re reading this post, we know you’ve also accidentally deleted some important data from your phone that you want to recover now, i.e., notes.
But don’t worry — you’ve just landed at the right place! In this post, we’re going to explore your options after you’ve deleted your notes and don’t have an iCloud or iTunes backup of them. We will offer two working methods to get them back. Without any further ado, let’s see how to recover deleted notes on iPhone without backup.
Is It Possible to Recover Deleted Notes on iPhone Without Backup?
Absolutely! It’s possible to recover deleted notes from your iPhone, even if you don’t have a backup. However, there are some things you should know.
After a note has been deleted from the Notes app, it goes to the “Recently Deleted” folder. From there, you have 30 days to recover it instantly without using any other tool. After 30 days, the note is deleted permanently and can’t be recovered from this folder anymore.
After a note has been permanently deleted, you can recover it from your phone’s storage using a reliable data recovery utility. We will recommend one in the following sections and explain how to use it in detail. So keep reading.
However, be noted that recovery tools work best if you use them as soon as possible after data loss. So, don’t delay!
Recover Deleted Notes on iPhone without Backup from Recently Deleted Folder
As said earlier, if it hasn’t been 30 days since you deleted the notes, you can recover them from the Recently Deleted folder.
This method is quite easy, but it only works if you act quickly and recover the notes before they’re permanently deleted. So, don’t waste any time and check your Recently Deleted folder right away.
Here’s the step-by-step process of how to recover deleted iPhone notes without backup using this method.
- Open the Notes app on your phone.
- Tap the “Recently Deleted” folder.
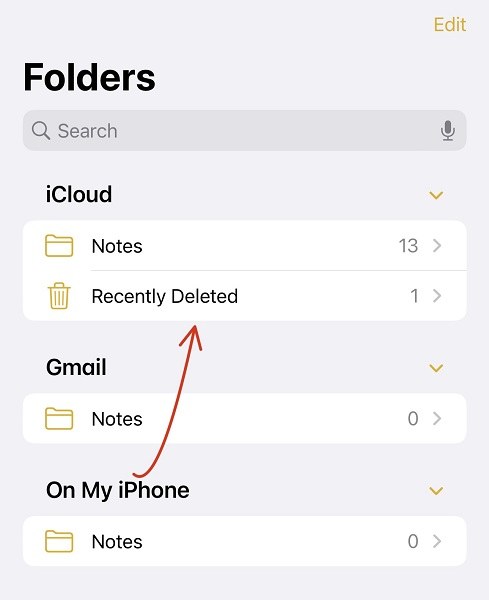
- If you see the note you deleted accidentally, you can recover it. If you don’t see it, you can skip this method and use the next one instead.
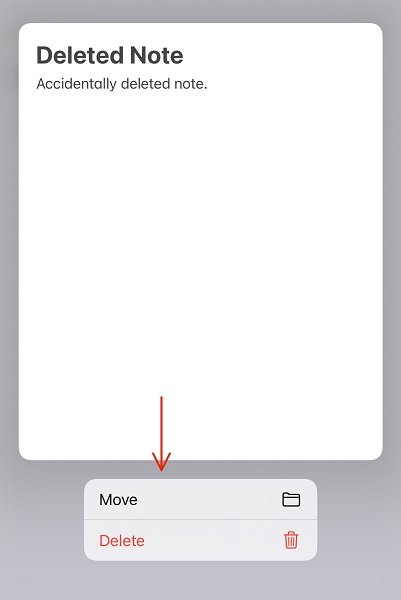
- Tap and hold on to the note until you see the menu.
- Tap “Move.”
- Tap the name of the folder where you’d like to save the deleted note.
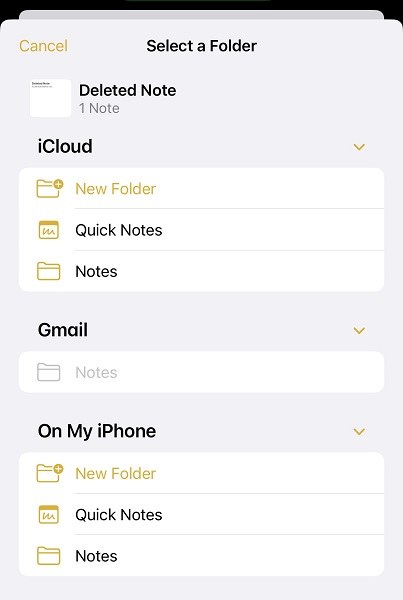
And that’s it! You’ve successfully recovered the deleted note.
Recover Deleted iPhone Notes without Backup Using A Third-party Tool
The abovementioned method only works if you recover the deleted note within 30 days. But — what happens if 30 days have already passed? How to recover permanently deleted notes on iPhone without iCloud?
In that case, you can use a third-party iPhone data recovery tool for the job. Lucky for you, we’ve got just the right tool you need!
It’s called Tenorshare UltData — one of the best and easiest-to-use tools you can find on the market right now.
Besides recovering notes, you can use it to recover all kinds of data, like photos, videos, contacts, and much more.
That said, here’s how to use it to get your deleted notes back.
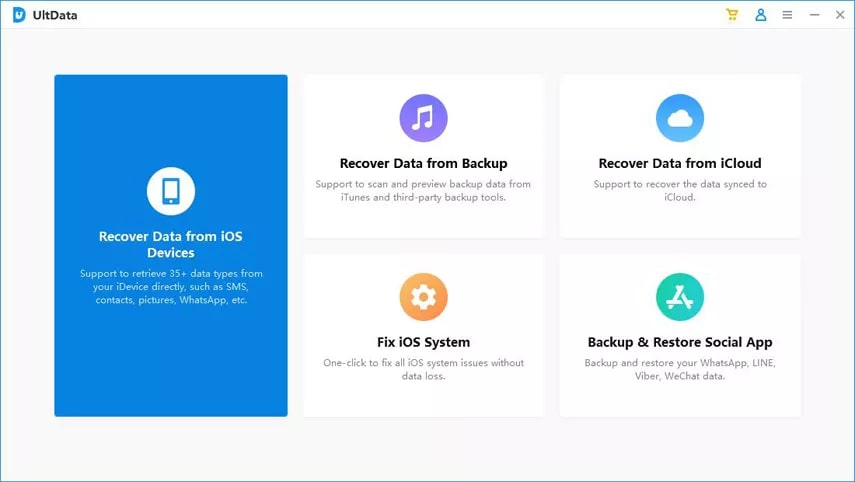
- Download and install Tenorshare UltData on your computer, then open it.
- Click “Recover Data from iOS Devices” on the main page.
- Connect your iPhone to the computer using a USB cable.
- Unlock your iPhone and tap “Trust” to connect it to your computer.
- From here, you can choose any kind of data you want to recover. In our case, you want to select “Notes & Attachments.”
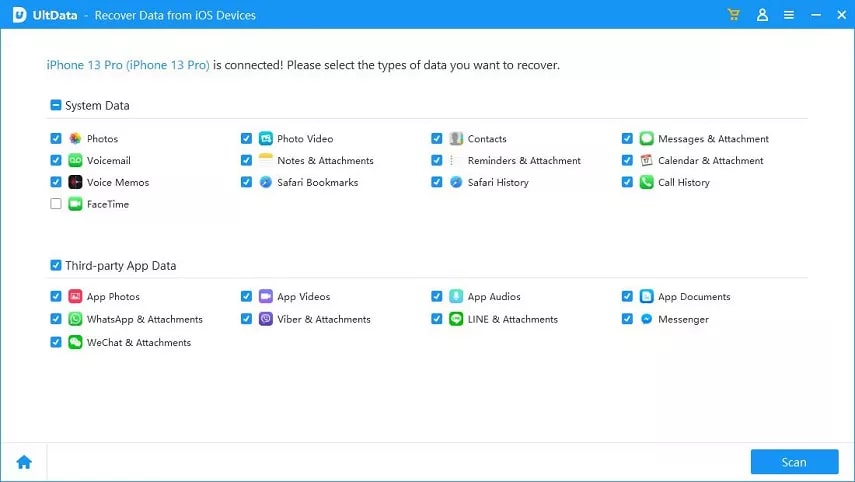
- Hit “Scan.”
- Choose the notes you’d like to recover, then click “Recover to PC.”
- Wait for the process to complete, and you’re all set!
The notes you selected will now be restored to your PC. From there, you can copy them to your iPhone’s Notes app again.
Frequently Asked Questions About Notes on iPhone
How long do deleted notes stay in the “Recently Deleted” folder?
Deleted notes stay in this folder for 30 days. After that, they’re removed permanently.
What types of data can I recover with Tenorshare UltData?
You can recover many data types using Tenorshare UltData — including photos, videos, notes, messages, contacts, call history, Safari history, voicemails, etc.
Does Tenorshare UltData really work for retrieving deleted notes on iPhone without backup?
Absolutely. Tenorshare UltData works well for recovering all kinds of data from your iPhone. It recovers the data from your device’s internal storage. So you don’t need a backup.
I didn’t delete notes, but they still disappeared; Why is that?
Some notes may automatically disappear from your Notes app if you accidentally disable iCloud sync for the Notes app. Upon doing this, the Notes saved in the cloud will be deleted from your iPhone.
To turn ON sync for the Notes app again, go to Settings > Apple ID > iCloud > See All > Notes. Then, turn ON the toggle for “Sync this iPhone.”
I don’t see the Recently Deleted folder; why?
After 30 days have passed, your deleted notes will be removed permanently. When that happens, the folder gets empty and will disappear. So, you won’t see the “Recently Deleted” folder in the Notes app anymore until you delete another note.
Conclusion
If you deleted the notes less than 30 days ago, look for them in the “Recently Deleted” folder of the Notes app. If you can find them there, you can restore them instantly.
However, if you deleted them more than 30 days ago, they might have been permanently deleted. At this point, Tenorshare UltData is your best bet to get the notes back.
